Showing posts with label Crafts. Show all posts

Thursday, March 31, 2011

DIY Party Decorations

I told you a little bit about Aly's birthday banners here.  Since I received quite a few compliments about the lamp decoration that I made, I going to share it here with you.
a
a
Aly's birthday "chandelier"
a
a
The lamp "before"


a
For the paper garlands: Aly and I cut out pink and purple cardboard with craft scissors and taped them on white string.  I draped them around the lamp.  For the middle part, I printed a sort of birthday logo on white cardboard, cut with craft scissors again, glued them on the colored cardboard, taped on purple ribbon and placed them on the center of the lamp.
a
a
This was a sort of last-minute idea but I love the big difference that it made on the lamp: I printed some of my favorite photos of Aly on parchment paper and placed them around with double-sided tape.  Be sure to edit the photos first.  They should be high contrast and very sharp for better effect.
a
a
a
 a
 a
 a
 a
The lamp from different angles.
a
a
The rest of the party decor.
a
a
a
a
a
Birthday banner.
a
a
More paper garlands.
 a
a
a
a
I didn't spend a lot on these decorations, by the way.  I don't remember the exact amount, but probably Thb250 (Php350) tops.  Most of the items that we used are leftovers from past events: the string from last year's birthday parties, ribbons and parchment paper from our wedding (almost 4 years old!).  So it really pays to DIY some stuff because you get to save the leftovers and keep them for future use.  Aly and I need a bigger craft/art supplies box!  It's great too that my daughter loves doing crafts with me.  It makes the event more special even if the party is just for the three of us.  But hey, a celebration IS a celebration and what matters most is being with the people that you love, right?  Hope this helps! :)

Friday, March 25, 2011

More On Aly's Birthday Preps

So we bought the gifts already.  This week, I worked on decorations.  We're planning to put them up tonight for maximum exposure.  Haha!  Here's a sneak peek on Aly's birthday banner.
a
a
Materials: pink and purple cardboard (cartolina), craft scissors, glue, pencil + colored pens.
a
a
These are all proudly handmade!  Aly helped me cut the triangles.  I drew all the letters myself (all that doodling during Filipino class in high school are starting to pay off haha!).
a
a
I decorated each letter with this year's theme: flowers and butterflies :)
a
a
Doing these handmade banners is not easy and it's a lot of work.  It took me 2-3 days to finish them (I can only work on them for a couple of hours each day) and at the end of each day, my hands would hurt a little.  But I just can't bring myself to shell out Thb300-500 for a birthday banner when I know that I can make one at a fraction of the cost.  Times like these, I really miss SM and National Bookstore back home.  They have everything there at a much cheaper price!  Then again, even with those around, I know I'd still make these myself.  I'm just glad I'm blessed with the knowhow.
a
a
Aly's birthday is two days away.  I'm so excited!!


Thursday, March 17, 2011

Paper Animals

One of the projects that Aly and I worked on were these paper animals.  She volunteered to help her teacher make them for their class presentation on Chapel day.  The fact that she volunteered to do this project was a milestone for us.  I used to think my Aly was the type of student who would just sit in the background and observe. Obviously, I was wrong.  I love her involvement in their class activity.  Kaya kahit masakit ulo ko that day and I was really looking forward to an afternoon nap, I had to brush my headache aside to help Aly.
a
a
I don't have superb drawing skills.  I can't draw things from scratch.  I do, however, have excellent copying skills.  Haha!  We searched Aly's books for the easiest animals that we can copy.  I don't like complicated drawings with shading, shadowing and stuff.  Hindi kaya ng powers ko.  I prefer the one-dimensional, cartoon-like drawings.  So this is what we came up with:
a
a
Our paper animals.  Pardon the grainy photos.  These were taken using my phone.
a
a
Some of my favorites include:
a
a
The purple elephant.
a
a
The penguin.  
Aly colored them with crayons and I love how it turned out.
a
a
The dove.  
I love the simplicity of this one.
a
a
The octopus.  
a
a
Check out the detail.
a
a
The ostrich.
a
a  
There were some animals that took more time to finish because I decided to add more details. I used the leftover cardboard (didn't want to waste them!), cut them into small pieces to come up with fish scales and feathers.
a
a
a
The parrot.
a
a
a
The fish.
a
a
a
Another bird.
a
a
a
A hummingbird.
a
a
I had fun making these!  And my headache did go away.  Thank goodness!  But the part that I like most was I made Aly happy.  Yeah, I spoil her like that.  She enjoyed making the project as well.  She thanked me with a big hug and a big kiss.  Sigh...the perks of being a mom!  Don't you just love it?

Friday, March 11, 2011

Aly's Family Timeline Project

Aly and I had fun working on her school project!  She chose her lolo Pete to be the main character of the timeline, which should include photos and artifacts.  Now I have to admit that I was a bit stressed with the project in the beginning because I don't have old photos and family artifacts here with me, but I learned to love it in the process.  It was fun looking at old photos, telling stories about my childhood and stuff.
a
a
Richard documented the entire process.
a
a
Working on the layout.
a
a
Aly did most of the work.  I just had to guide her.
a
a
Smile for daddy!
a
a
A sneak peek.
a
a
Aly in action!
a
a
We had fun making the timeline!
a
a
Thank you, sweetie for taking photos!
a
a
One week later, the project was finally done!
a
a
Our labor of love.
a
a
It took a week to finish, but it was worth it.  Big thanks to lola Aple, tita Angel and tito Jof for sending the photos!  


Monday, January 31, 2011

Candle Making Class

Chatrium conducts monthly seminars for hotel guests and residents, particularly for stay-at-home mommies like me.  In the past, I have attended a flower arrangement seminar and a Thai cooking class.  Last Friday, I went to a candle making class.
a
a
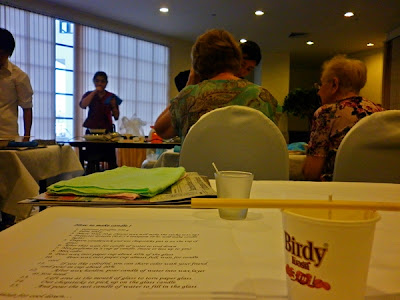
A good number of hotel staff was there to assist us, specially with heating the wax.  We were actually a little bit spoiled because all we had to do was sit there and wait while they do the dirty work for us.  Heehee!
a
a
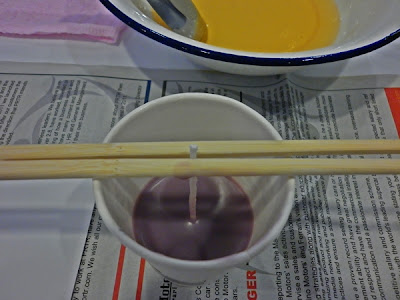
Materials for candle #1: A paper cup, ready-made wick and disposable chopsticks.  To prepare the wick, you should insert it between the chopsticks to make sure that it stands upright when you pour the hot wax.
a
a
This is the wax.  It's a mixture of different components like paraffin, natural wax and other stuff.  I don't remember the ingredients and their exact proportions because the staff melted the wax mixture for us so it arrived on my table like this already.
a
a
That's the staff member adding in the essential oil.  Told you they do the dirty work for us!  I left the class with clean hands.  Imagine that.  Heehee!  
a
a
They used vanilla, by the way.  The scent in the room was too strong but I love how my shirt smelled like vanilla hours after the class.
a
a
Stir the mixture gently after you pour in the essential oil.
a
a
That's our teacher adding dye to my wax mixture.  I asked for purple, my favorite :)
a
a
She used very little powdered dye.
a
a
I thought it was going to be this kind of purple so I was kinda sad.
a
a
But then she added a little bit of red so it became like this.  Hmmm...Not my perfect shade of purple pero pwede na rin.
a
a
My first layer of purple wax.  If I had my way, I would make my candle purple all the way.  But everyone in class was doing three layers in different colors so nakigaya na rin ako.  Hehe!
a
a
We used this metal spoon to pour the wax in the paper cup.
a
a
Wait for the first layer to cool before pouring the next one.
a
a
Make sure too that the wax for your 2nd layer is not too hot before pouring it.  Otherwise, the first layer will melt and the colors will mix.
a
a
My 2nd layer: yellow.
a
a
While waiting for my 2nd layer to cool, we made candle #2.  Same procedure, but this time in a glass.
a
a
Same vanilla scent, but only one color this time.
a
a
This is how the purple wax looks like when it has cooled.  It's not as bad as I thought it would be!
a
a
Waiting...
a
a
Still waiting...
a
a
Finally!  I used the rest of the wax for my 3rd layer.  Don't fill the paper cup to the brim.  You need to leave a little bit of space on top so it will be easier to peel the paper cup off.
a
a
And pour the wax slowly to avoid bubbles.  I poured the rest of the wax too quickly hence the bubbles.
a
a
For the glass candle, you might notice that the center will sink a little when the wax cools.  You just need to add a little bit more hot wax to make it level.
a
a
Almost ready!  The wick is off center, though.  Heehee!
a
a
You have to wait for six hours pala before you can remove the paper cup.
a
a
My two candle projects :)
a
a
We were given a nice box for the glass candles.
a
a
Ready to go!
a
a
Six hours later, tadaaah!  My puto bumbong with star margarine inspired candle project.  Haha!
a
a
The candle making class was fun!  I just wish we were more hands-on.  Or maybe just me; I might be the only one in class who doesn't mind getting her hands dirty.