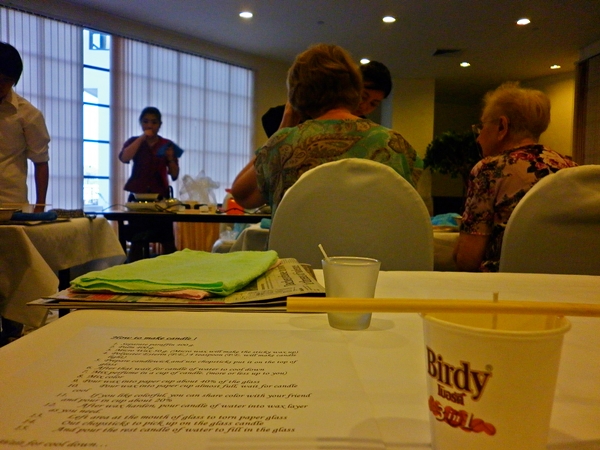
Chatrium conducts monthly seminars for hotel guests and residents, particularly for stay-at-home mommies like me. In the past, I have attended a flower arrangement seminar and a Thai cooking class. Last Friday, I went to a candle making class.
a
a
A good number of hotel staff was there to assist us, specially with heating the wax. We were actually a little bit spoiled because all we had to do was sit there and wait while they do the dirty work for us. Heehee!
a
a

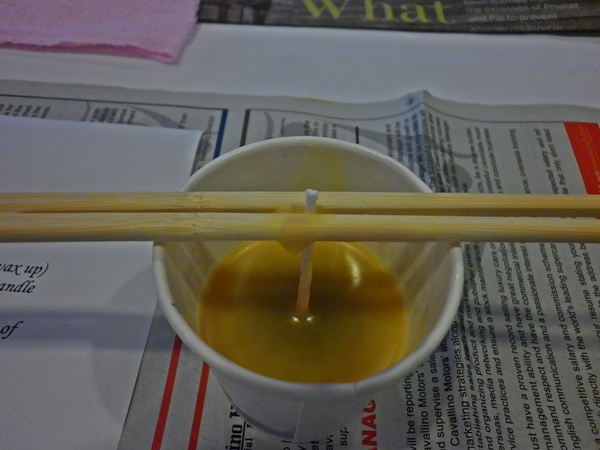
Materials for candle #1: A paper cup, ready-made wick and disposable chopsticks. To prepare the wick, you should insert it between the chopsticks to make sure that it stands upright when you pour the hot wax.
a
a

This is the wax. It's a mixture of different components like paraffin, natural wax and other stuff. I don't remember the ingredients and their exact proportions because the staff melted the wax mixture for us so it arrived on my table like this already.
a
a

That's the staff member adding in the essential oil. Told you they do the dirty work for us! I left the class with clean hands. Imagine that. Heehee!
a
a

They used vanilla, by the way. The scent in the room was too strong but I love how my shirt smelled like vanilla hours after the class.
a
a

Stir the mixture gently after you pour in the essential oil.
a
a

That's our teacher adding dye to my wax mixture. I asked for purple, my favorite :)
a
a

She used very little powdered dye.
a
a

I thought it was going to be this kind of purple so I was kinda sad.
a
a

But then she added a little bit of red so it became like this. Hmmm...Not my perfect shade of purple pero pwede na rin.
a
a

My first layer of purple wax. If I had my way, I would make my candle purple all the way. But everyone in class was doing three layers in different colors so nakigaya na rin ako. Hehe!
a
a

We used this metal spoon to pour the wax in the paper cup.
a
a

Wait for the first layer to cool before pouring the next one.
a
a

Make sure too that the wax for your 2nd layer is not too hot before pouring it. Otherwise, the first layer will melt and the colors will mix.
a
a

My 2nd layer: yellow.
a
a

While waiting for my 2nd layer to cool, we made candle #2. Same procedure, but this time in a glass.
a
a

Same vanilla scent, but only one color this time.
a
a

This is how the purple wax looks like when it has cooled. It's not as bad as I thought it would be!
a
a

Waiting...
a
a
Still waiting...
a
a

Finally! I used the rest of the wax for my 3rd layer. Don't fill the paper cup to the brim. You need to leave a little bit of space on top so it will be easier to peel the paper cup off.
a
a

And pour the wax slowly to avoid bubbles. I poured the rest of the wax too quickly hence the bubbles.
a
a

For the glass candle, you might notice that the center will sink a little when the wax cools. You just need to add a little bit more hot wax to make it level.
a
a

Almost ready! The wick is off center, though. Heehee!
a
a

You have to wait for six hours pala before you can remove the paper cup.
a
a

My two candle projects :)
a
a

We were given a nice box for the glass candles.
a
a

Ready to go!
a
a

Six hours later, tadaaah! My puto bumbong with star margarine inspired candle project. Haha!
a
a
The candle making class was fun! I just wish we were more hands-on. Or maybe just me; I might be the only one in class who doesn't mind getting her hands dirty.